
Welcome to our step-by-step guide for an effortless DIY popcorn ceiling removal. Sick of your old-fashioned popcorn ceiling? To effortlessly remove popcorn ceilings and give your room a modern, fresh look, follow our thorough guide.
Popcorn ceilings are a type of ceiling treatment distinguished by a textured surface that resembles popcorn or cottage cheese.
They are also referred to as textured ceilings or acoustic ceilings.
To create the texture, paint and tiny granules, like vermiculite or Styrofoam, are usually sprayed onto the ceiling surface.
Popcorn ceilings gained popularity in the middle of the 20th century because of their capacity to conceal flaws and reduce noise in living spaces.
Reasons for removing popcorn ceilings
- Outdated appearance: Popcorn ceilings can give a space a dated or ugly appearance that makes it appear less modern or old-fashioned.
- Difficult to maintain: Popcorn ceilings are challenging to clean and maintain because of their textured surface, which can collect dust and cobwebs.
- Possible health risks: If popcorn ceilings installed before the late 1970s are disturbed during removal or renovation, they may contain asbestos, a known carcinogen, which could be harmful to one’s health.
- Remodeling or renovation: To update the appearance of their house or raise its resale value, homeowners may decide to remove popcorn ceilings as a part of a larger renovation project.
Overview of the DIY removal process
- Preparation: Assemble the required equipment and supplies, perform an asbestos test if necessary, and set up the workspace by covering the furniture and floors with plastic sheeting.
- Wetting the ceiling: To loosen the texture and make it easier to scrape off, mist a tiny area of the ceiling with water.
- Scraping off the texture: Scrape off the softened texture gently in small sections using a ceiling scraper or a wide putty knife.
- Patching and repairing: After checking for flaws in the ceiling, fill them in with joint compound or spackle and sand the area smooth after it has dried.
- Final details: Prime the ceiling, and the whole thing lightly and paint it if you’d like.
- Clear the area: Take off the plastic sheeting, vacuum or broom the floor, and dispose of the removed popcorn texture and debris appropriately.
Preparation
A. Gather necessary tools and materials: –
- List of tools and materials required for the popcorn ceiling removal process, including:
- Wide putty knife or scraper for ceilings
- A spray bottle or garden sprayer
- Spackle or joint compound Sandpaper with fine grit Primer
- paint (optional)
- plastic sheeting
- paint
- Tape for painting
- Safety eyewear
- A dust mask
- Handkerchiefs
- Wearing clothes that protect
B. Prepare the workspace:
- Cover floors and furniture with plastic sheeting:
- -During the removal process, cover floors and furniture with plastic sheeting to keep them safe from dust, debris, and moisture.
- Tape painter’s tape around the edges of the plastic sheeting to keep it from moving or shifting.
- Use painter’s tape to protect walls and trim:
- To prevent damage during scraping and sanding, apply painter’s tape along the edges of walls, trim, and any other nearby surfaces.
- Make sure the painter’s tape is firmly attached to surfaces to create a tight seal and reduce the possibility of paint or texture seepage.
- Ensure proper ventilation with fans or open windows:
- Install fans in the space to improve ventilation and air circulation, which will aid in the dispersal of fumes and dust produced during the removal process.
- Let fresh air enter the room through open windows and doors to improve ventilation and lower the concentration of airborne particles.
- Wear appropriate safety gear: goggles, dust mask, gloves, and protective clothing:
- Wear safety goggles to shield your eyes from dust and debris that could fly into the air when sanding and scraping.
- To avoid breathing in dust and other airborne particles produced during the removal process, put on a dust mask.
- Put on gloves to reduce direct contact with chemicals and irritants, shield your hands from sharp objects, and handle abrasive materials.
- Cover exposed skin with protective apparel, such as long sleeves and pants, to reduce skin contact with potentially harmful substances.
Testing for Asbestos
The mineral fiber known for its strength and heat resistance, asbestos, may be present in popcorn ceilings installed before the late 1970s.
Because of its fire-retardant qualities, asbestos was frequently used in building materials, such as the texture of popcorn ceilings.
Damage or disturbance to asbestos-containing materials can release microscopic fibers into the air, which can be breathed and result in major health issues such as mesothelioma and lung cancer.
Thus, it’s imperative to exercise caution and conduct an asbestos test before removing popcorn ceilings, particularly in older homes.
Steps for testing:
- Wet a tiny portion of the ceiling with water:
- Dampen a tiny portion of the popcorn ceiling texture with a spray bottle or garden sprayer. During the sampling process, wetting the texture helps stop asbestos fibers from releasing into the air.
- To make sure the texture is fully moistened, let the water seep into it for a few minutes.
- Remove a tiny piece of the moist texture with a scraper:
- Using a putty knife or scraper tool, carefully remove a small sample of the damp popcorn ceiling texture.
- To prevent asbestos fibers from spreading, gather the sample in a pristine plastic bag or container with the least amount of disturbance to the surrounding area.
- Place the sample in a plastic bag and forward it for analysis to an accredited laboratory:
- Tightly close the plastic bag holding the sample to stop any fibers from escaping.
- Write the sample collection date and location on the bag’s label.
- Contact a certified asbestos testing laboratory or environmental consulting firm to arrange for an analysis of the sample.
- Follow the laboratory’s instructions for shipping and handling of the sample to ensure accurate testing results.
Wait for test results before proceeding with removal:
- It’s crucial to hold off on removing the popcorn ceiling until the certified laboratory’s test results are in.
- If the test results show that asbestos is present in the texture of the ceiling, further safety measures and steps might be required to remove the material safely.
- Before you remove the popcorn ceiling, make sure you have confirmation from the laboratory that it is safe to do so.
Removal Process
A. Wetting the Ceiling
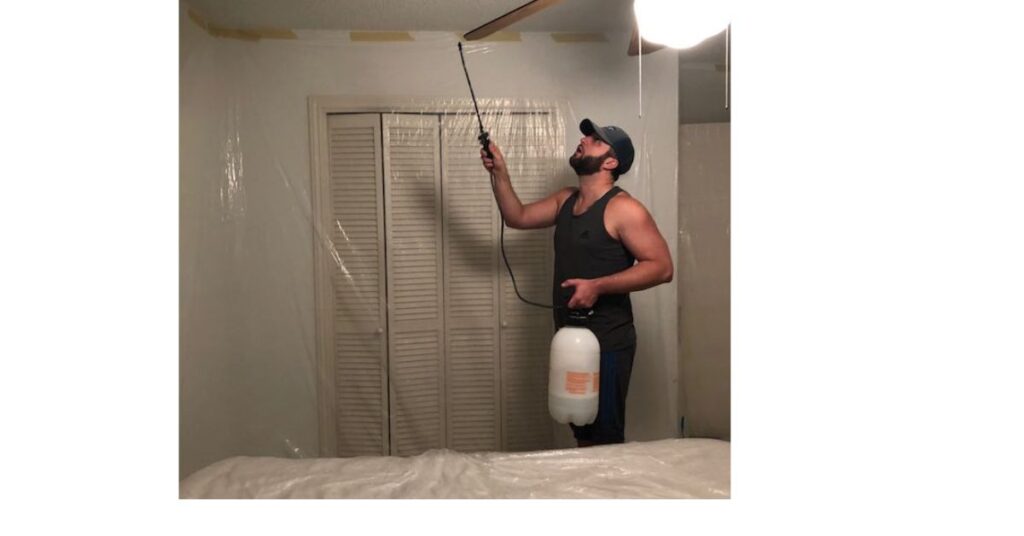
- Using a garden sprayer or spray bottle, lightly mist a small area of the ceiling:
- Use water to completely cover the popcorn texture, softening it so that removal will be simpler.
- Starting with a manageable area of the ceiling—usually no more than 4 by 4 feet—will help you avoid having to scrape the water out before it dries out.
- To loosen the texture, let the water seep into it for a short while:
- To guarantee that the water sufficiently softens the material, let it permeate the texture for at least ten to fifteen minutes.
- Refrain from flooding the ceiling too much because too much moisture can harm the drywall underneath.
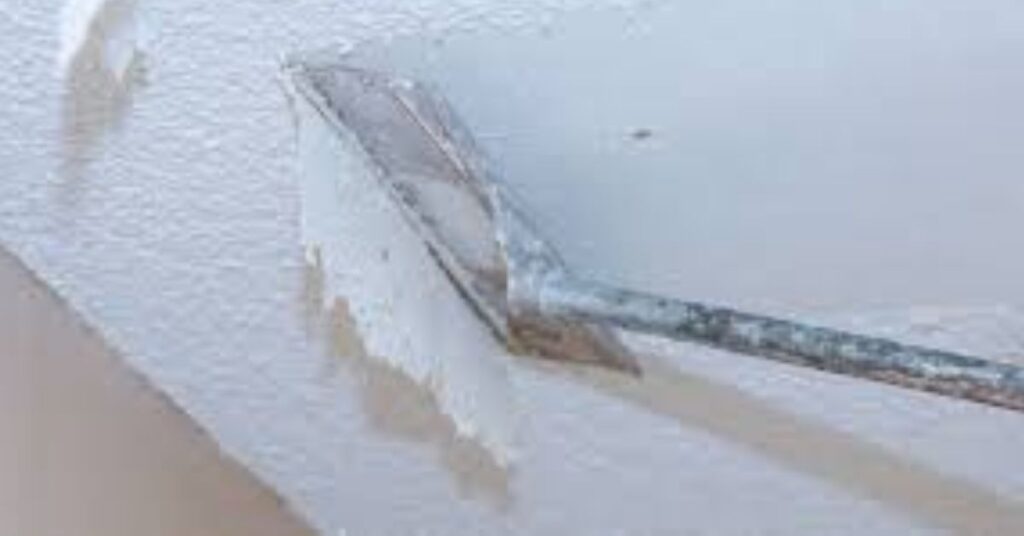
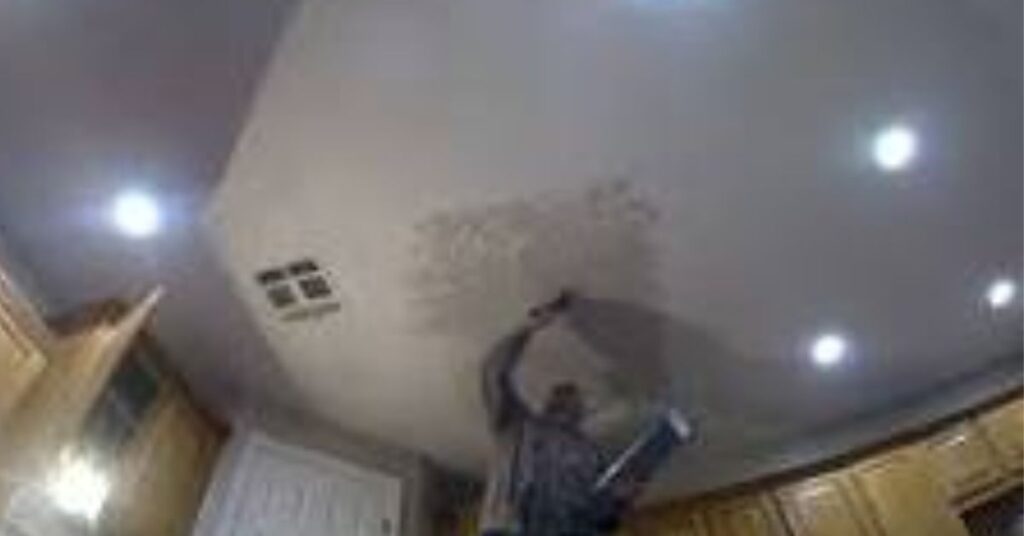
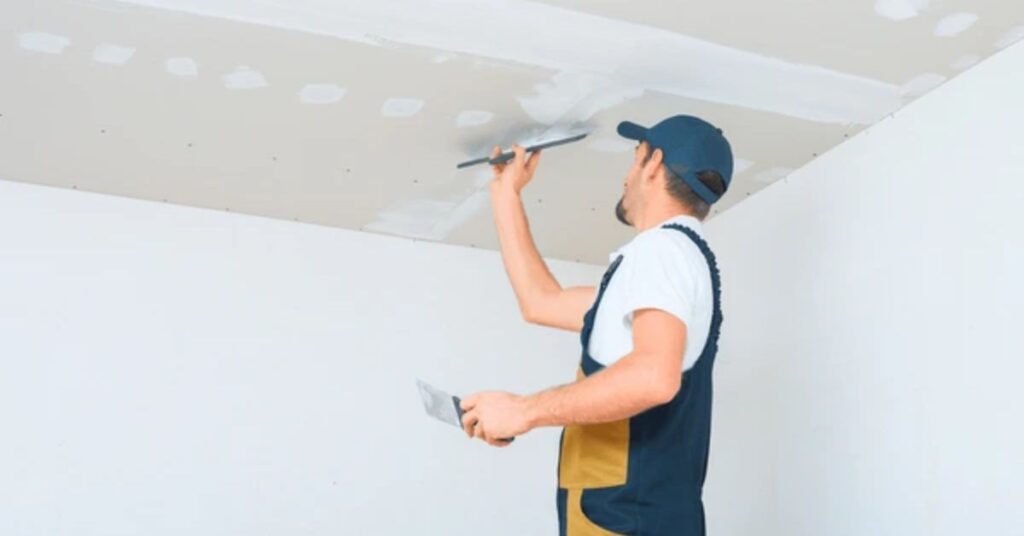
B. Scraping Off the Texture
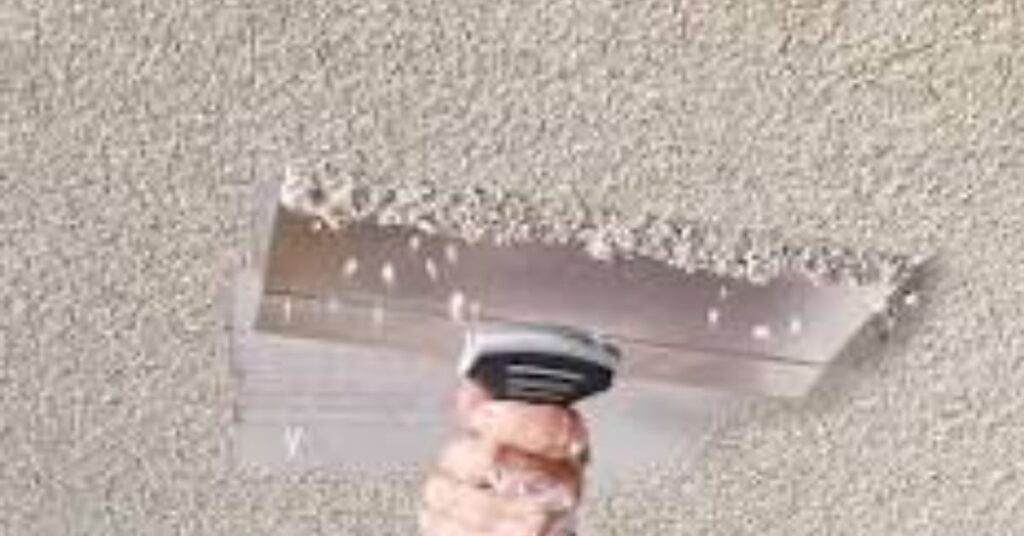
- Use a wide putty knife or a specialized ceiling scraper tool to gently scrape off the softened texture:
- To prevent gouging or harming the drywall, hold the scraper tool at a slight angle to the ceiling.
- To remove the texture, start scraping from one edge of the wet section and proceed slowly and carefully.
- Work in small sections, being careful not to damage the underlying drywall:
- To avoid getting tired and guarantee complete removal, divide the ceiling into manageable sections and concentrate on one area at a time.
- Be cautious when scraping to prevent uneven patches or drywall surface damage. – Scrape consistently and evenly.
- Keep soaking and scraping until the ceiling is smooth all the way around:
- Take breaks as needed to rest and let the removed texture accumulate for disposal.
- Carefully work across the entire ceiling, reapplying water as needed to keep the texture moist and pliable.
C. Patching and Repairing
- Inspect the ceiling for any dents, holes, or imperfections:
- Carefully inspect the ceiling surface to identify any areas that need patching or repair after the popcorn texture has been removed.
- Before refinishing the ceiling, look for any obvious damage, such as holes, cracks, or uneven areas, that may need to be fixed.
- Fill any imperfections with joint compound or spackle:
- To repair any dents, holes, or uneven spots on the ceiling surface, use a joint compound or spackle and a putty knife.
- Apply the spackle or compound thinly at first, adding more material little by little until the imperfections are filled in and evened out.
- Sand the patched areas smooth once dry:
- Smooth the patched areas with fine-grit sandpaper after the joint compound or spackle has fully dried.
- To achieve a seamless finish, sand the repaired areas gently and uniformly with a light touch.
- Before priming and painting the ceiling, remove any dust or debris with a clean cloth or vacuum.
Finishing Touches
A. Sanding and Smoothing
- Smooth out any rough spots or residue on the ceiling by lightly sanding the entire surface:
- using a sanding pole or sanding block loaded with fine-grit sandpaper.
- To guarantee a smooth and even finish, concentrate on the areas where joint compound or spackle was applied during patching.
- To reduce the chance of damaging the drywall surface:
- use sandpaper with a finer grit. A 120-grit or finer sandpaper would be an excellent choice.
- For a smooth and even finish, sand in a circular motion or with long, even strokes while using little force
B. Priming
- Apply a coat of primer to the entire ceiling surface to seal and prepare it for painting:
- To enhance paint adhesion and coverage, use a premium primer designed especially for ceiling applications.
- Apply an even layer of primer to the ceiling using a paint roller fitted with a medium-nap roller cover after emptying the primer into a paint tray.
- Start in a corner of the room and work your way across the ceiling in a methodical manner in little segments.
- Use a primer specifically formulated for use on ceilings:
- Select a primer that offers a uniform, smooth surface for painting and is made to stick well to drywall.
- If you are painting over water stains or other stains on the ceiling, look for a primer that has stain-blocking qualities.
- To guarantee the best results, adhere to the manufacturer’s instructions regarding mixing, application, and drying periods.
C. Additional Tips:
- Before painting the ceiling, let the primer dry completely.
- Before using a roller to apply primer and paint to the larger areas, use a paintbrush to cut in around the edges of the ceiling and any fixtures.
- Add more paint or primer coats as necessary to get the coverage and finish you want.
- Use drop cloths or plastic sheeting to shield the floor and any furniture in the space from paint and primer drips and spatters.
Cleanup
A. Remove plastic sheeting and painter’s tape from walls and furniture:
- Peel off the plastic sheeting covering the floors and any furniture with caution, making sure to contain any debris that may be trapped underneath.
- Being cautious not to scratch recently painted surfaces or remove any underlying paint, carefully remove painter’s tape from walls and trim.
B. Vacuum or sweep the floor to remove any dust or debris:
- To clean the floor of any dust, debris, or loose popcorn texture particles, use a broom or a vacuum cleaner attachment with a brush.
- Particular attention should be paid to edges, corners, and other difficult-to-reach places where debris may collect.
C. Dispose of removed popcorn texture and other debris properly:
- If the texture of the popcorn contains asbestos or other hazardous materials, dispose of it according to local hazardous waste disposal regulations and guidelines.
- Make sure the heavy-duty garbage bags are tightly sealed to stop any dust or fibers from escaping after the removed popcorn texture and any other debris has been placed inside.
- Place the filled trash bags in the proper disposal container or make arrangements for a waste management service to pick them up.
- Before storing them for later use, clean any tools or equipment—such as scrapers and sanding tools—that were used during the removal process to get rid of any leftover texture or debris.
- After cleaning is finished, check the room to make sure all dust, debris, and leftover popcorn ceiling removal have been eliminated before leaving the area.
Painting
A. Choose a paint color and finish for the ceiling:
- Choose a color for the paint job that both fits your design preferences and the room’s overall aesthetic.
- When selecting a paint color, take into account various aspects like the lighting, size of the room, and the existing decor.
- Based on the desired look and functional factors like durability and ease of cleaning, choose the paint finish (flat, eggshell, or satin).
B. Apply paint using a roller or paint sprayer, following manufacturer instructions:
- To guarantee an even consistency, prepare the paint according to the manufacturer’s instructions, stirring well.
- If using a roller, pour the paint into a paint tray; if using a paint sprayer, pour the paint into the reservoir.
- To paint the entire ceiling surface evenly, use a high-quality paint roller or sprayer.
- Start in a corner of the room and work your way across the ceiling in a methodical manner in little segments.
- For even coverage and to reduce the appearance of brush or roller marks, use long, overlapping strokes.
- To prevent uneven application, keep a consistent distance from the ceiling surface and move the paint sprayer in smooth, steady motions.
C. Allow the paint to dry completely before moving furniture back into the room:
- Pay attention to the drying time recommended on the paint can label. Depending on the type of paint and the surrounding circumstances, this time can vary from a few hours to overnight.
- To speed up the drying process and reduce residual paint fumes, keep the room well-ventilated.
- To avoid smudges or damage, do not touch or disturb the painted surface until the paint has completely cured.
- You can safely reposition furniture in the room and take pleasure in your freshly painted ceiling once the paint has dried to the touch and cured by the manufacturer’s instructions.
Conclusion
- List the essential actions in the DIY popcorn ceiling removal method that were previously described in the guide, such as wetting the ceiling, priming, sanding, and smoothing the surface, repairing imperfections, scraping off the texture, patching, and painting, if desired.
- Stress the significance of meticulous planning, cautious execution, and close attention to detail to accomplish a successful removal process.
- Emphasize how crucial it is to put safety first when removing popcorn ceilings, especially when working with older ceilings that might contain asbestos.
- Stress again how important it is to properly test for asbestos before beginning any removal work and how important it is to abide by safety recommendations to reduce exposure to dangerous fibers.
- To ensure a safe and healthy working environment, homeowners should be encouraged to wear the proper protective gear, maintain good ventilation, and use caution when handling and disposing of materials.
- Congratulate the homeowners on finishing the task of removing the popcorn ceiling and giving their living area a modern, refreshed appearance.
- Motivate them to be proud of their work and enjoy the enhanced cleanliness, aesthetic appeal, and possible property value that comes with getting rid of those old popcorn ceilings.
- Encourage them to add unique finishing touches and ornamental accents to their recently renovated ceilings to accentuate their aesthetic appeal and make their living area feel cozier and cozier.
FAQs
What is the step-by-step process for popcorn ceiling removal?
Steps typically include wetting the ceiling, scraping off the texture, repairing any damage, sanding, priming, and painting.
How do I prepare the room for popcorn ceiling removal?
Clear the room of furniture, cover floors and walls with plastic sheeting, and ensure proper ventilation. It’s also advisable to turn off electricity in the room as a safety precaution.
How long does popcorn ceiling removal take?
The duration depends on the size of the room, the condition of the ceiling, and your level of experience. It can range from a few hours to several days.
Can I paint the ceiling immediately after popcorn removal?
Yes, you can paint the ceiling immediately after popcorn removal.
ALSO READ