Are you hoping to improve your home’s aesthetic appeal? Crown molding is a great option if that’s the case.
We will go through the process of cutting and installing crown molding like a pro in this in-depth post. You’ll be to add a touch of sophistication and elegance to any room in your house by following these instructions.
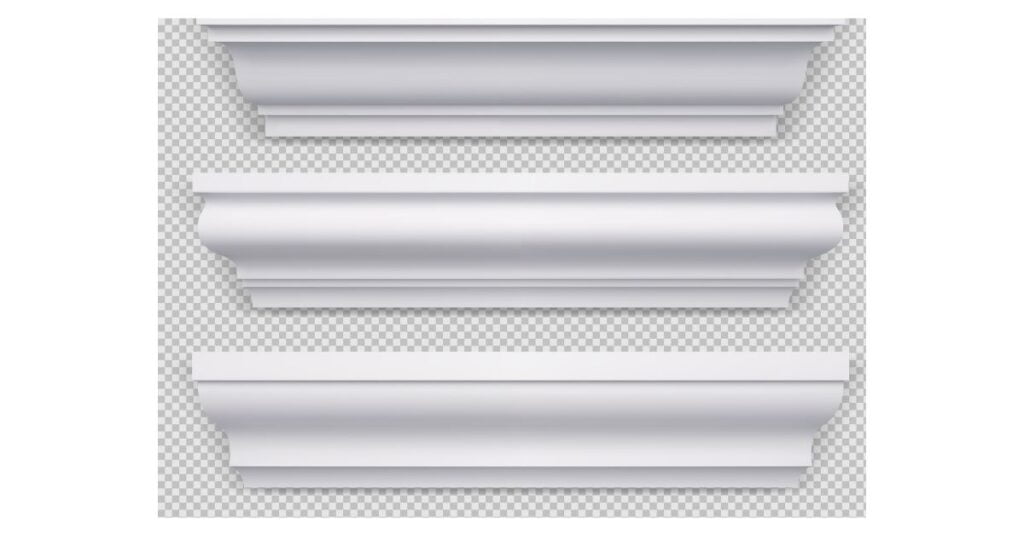
The timeless architectural element of crown molding can completely change the appearance and atmosphere of a room. It gives walls a final flourish that gives them depth and personality.
Although the process may initially seem difficult, you can produce professional results with the right supplies, equipment, and methods.
This instruction manual will go over gathering the required supplies and tools, taking precise measurements, cutting the molding, dealing with inside corners, and installing the molding precisely.
In order to guarantee a flawless outcome, we’ll also walk you through the filling and finishing procedures.
during this process, accuracy, meticulousness, and patience are essential.
Consequently, let’s get started and discover how to cut and install crown molding, like a pro. Prepare to turn your room into an opulent and stylish retreat!
step I: Gathering Materials and Tools
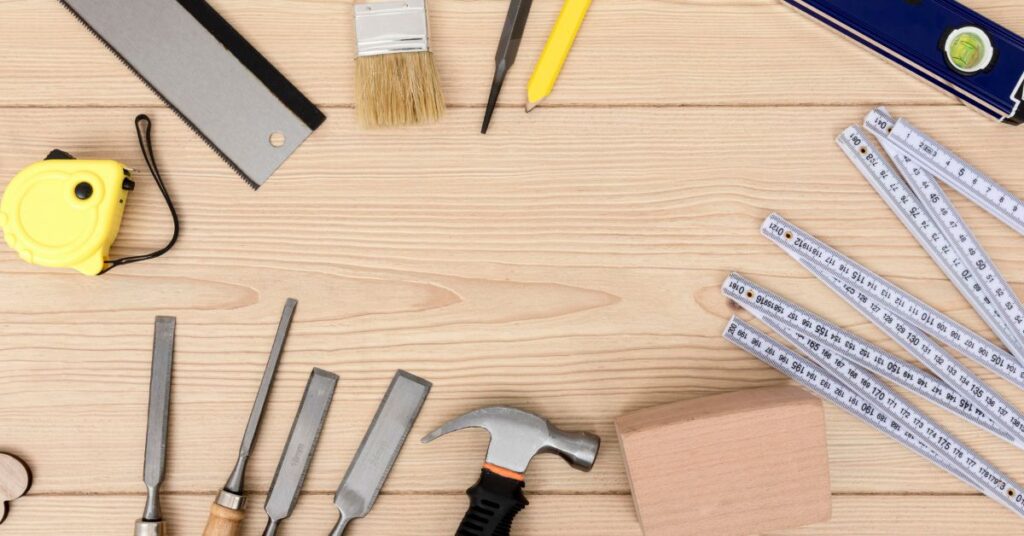
You must gather the required supplies and equipment before starting your installation project for crown molding. Here is a list of what you will require:
Crown molding: Select crown molding that matches your personal style and the size of the walls on which it will be installed. To determine the required length, measure the walls.
Measuring tape: With the aid of a measuring tape, you can precisely gauge the dimensions of the walls and determine how long the crown molding should be cut.
Mitre saw: For cutting precise angles in crown molding, a miter saw is a necessary tool. You can make precise cuts that are clean thanks to it.
Coping saw: A coping saw is used to make precise cuts, particularly when coping with crown molding joints. You can create secure and seamless connections between pieces with the aid of this tool.
Nail gun or hammer: To attach the crown molding to the wall, you will need a nail gun or hammer. A nail gun will speed up the process, but you can also use a hammer if you’d rather.
Level: To ensure that the crown molding is installed straight and level, a level is required. You’ll be able to steer clear of any sloping or uneven lines.
Wood filler: Wood filler is used to cover nail holes and gaps in crown molding joints. Once the installation is finished, it aids in creating a seamless and polished appearance.
Sandpaper: Sandpaper is necessary for removing any burrs or flaws from the crown molding. It will give you a polished, smooth finish before you paint or stain.
Before beginning your project to install crown molding, be sure to gather all of these supplies and tools. Having everything prepared will enable you to work more productively and get the best outcomes. # Cutting and installing crown molding.
step II: Taking Accurate Measurements

To ensure a proper fit, precise measurements must be taken before cutting your crown molding. To precisely measure and mark the crown molding, take the following actions.
Measure the length of each wall before you begin: Use a measuring tape to determine the length of each wall before you begin installing the crown molding. Take a measurement from corner to corner, accounting for any openings like doors or windows. Record the dimensions for each wall.
Take into account the corners and any architectural features: Pay attention to any angles, corners, or architectural details in the room. To fit these corners properly, crown molding typically needs to be cut at an angle. Use a protractor or a digital angle finder to determine the angles of each corner. To ensure that the crown molding is properly aligned, measure the height of any architectural features, such as a fireplace mantel.
Mark the dimensions on the molding: With the aid of a pencil, write the dimensions on the crown molding. Mark the appropriate length on the longest wall first. Mark the cut’s angle and direction for inside corners. Mark the angle and direction for the exterior corners as well. Before beginning the cutting process, confirm the accuracy of your measurements and markings.
To achieve a seamless and well-fitted crown molding installation, precise measurements are essential. Accuracy at this stage will result in a professional-looking finish and make the cutting and installation process much smoother.
step III: Cutting the Crown Molding
It’s time to cut the crown molding now that you have precise measurements and an understanding of the angles required for your corners. To cut precisely, adhere to these steps:
Set up your miter saw: Rotate the blade to the correct angle for your inside and outside corners, which is typically 45 degrees. Check your measurements, then make the appropriate miter saw adjustments. Before continuing, make sure that the saw is properly positioned and stable.
Put the molding in an upside-down position: Lay the crown molding on the miter saw table with the wall side facing up. Make sure the molding rests firmly and securely against the saw’s fence, and angle it against it. The angle of the miter saw should match the angle of the angled cut.
Make the initial cut by aligning the miter saw blade with the crown molding’s marked line. With a firm grip on the molding, cut the material, being mindful of the corner’s left and right orientations.
For inside corners, the cut’s left side will line up with the corner’s right side. The opposite will be true for outside corners. Before making the cut, demonstrate the angle and direction to ensure accuracy.
Carry on cutting all the crown molding pieces required for your installation after making the initial cut. Always be consistent in your cutting technique. To ensure a precise fit, check the direction of each piece’s corners and angles. Before cutting each piece, check measurements and angles again to prevent errors.
You can accurately cut your crown molding and get consistent results by following these instructions.
Take your time during this phase to make sure the angles and cuts are accurate because they will have a big impact on the installation’s outcome.
step IV: Coping the Inside Corners
Coping the molding is required when working with inside corners to ensure a seamless fit.To cope with the inside corners of your crown molding, follow these steps:
Deal with the molding: Pick up the first piece of inside-corner-fitting crown molding. You’ll use a coping saw to cut a precise fit against the neighboring piece rather than making a mitered cut. Joints that have been covered produce a tighter, more seamless connection.
Use a coping saw to carefully cut along the edge of the first piece.
Follow the contours of the profile, creating a snug fit with the adjacent piece.
Make use of a coping saw: Begin by firmly holding the first piece of molding. Use a coping saw to carefully cut along the molding’s edge while adhering to its profile contours. To make the edge fit tightly against the neighboring piece, the material behind it must be removed. Make precise, clean cuts while taking your time.
Adhere to the contours: As you apply the molding, make sure to adhere to the profile’s curves and contours. The aim is to make a joint that presses firmly against the adjacent piece. Avoid removing too much fabric as doing so can alter the fit and appearance.
Sandpaper is used to smooth any rough edges or flaws in the cut after the molding has been coped.
Next, test the fit. When the pieces are installed, this will guarantee a seamless connection. By putting the coped molding up against the neighboring piece, you can check the fit.
There should be no obvious gaps or irregularities, and it should fit snugly. Once a precise and snug fit is achieved, make any necessary adjustments.
Making standard mitered cuts is easier than dealing with inside corners. However, you can produce a result that looks professional with time and care. Take your time when coping because the accuracy of the cuts will have a big impact on how your installed crown molding looks overall.
#cutting and installing crown molding.
step V: Installing the Crown Molding
It’s time to install your crown molding now that it has been copied and cut. To ensure a successful installation, follow these steps:
Begin on the longest wall in the room: Start the installation process on the room’s longest wall. Along the back of the crown molding, run a thin bead of wood glue. Additional stability and adhesion will result from this.
Firmly press the molding into place: Align the crown molding with the previously marked measurements by gently pressing it against the wall. To ensure proper adhesion, apply even pressure along the entire length of the molding.
Fix the molding: To fix the crown molding in place, use a nail gun or hammer and nails. Angle the nails to go into the ceiling joists or studs behind the molding. For stability, place the nails every 16 inches or as necessary. If using a nail gun, use it according to the manufacturer’s instructions.
Repeat step D: installing each crown molding piece one at a time as you move along the wall. Make sure that each piece fits snugly and is correctly aligned with the one next to it. Apply glue again, press the molding down firmly, and fasten it with nails.
Check the level periodically as you install each piece to make sure the crown molding is straight. By repositioning or lightly tapping with a hammer, adjust as necessary. You can create an installation with straight lines and evenness with the aid of a level.
Continue installing the crown molding piece by piece as you move around the room.
Spend some time making sure everything fits and aligns precisely. Make sure the corners and joints are seamless and connected properly by paying close attention to them.
You can successfully install your crown molding and give your room a classy, finished appearance by following these instructions.
Step VI: Dealing with Outside Corners:
To ensure a proper fit and seamless installation, take the following actions when it comes to outside corners:
Use a miter saw and angle it at a 45-degree angle. Orient the crown molding so that the wall side is facing up and place it upside down on the saw table. As you place the molding against the saw’s fence, make sure the marked line is parallel to the blade. Make the cut on the molding so that it is at a 45-degree angle.
Align the parts: Place the first crown molding piece for the exterior corner up against the wall, mitered edge lining up with the corner of the wall. Check that the two mitered edges form a straight, uninterrupted line to ensure a tight fit.
Nail or use a nail gun to fasten: When the pieces are in place and snugly fitted, fasten the molding to the wall with nails or a nail gun. Angle the nails to go into the ceiling joists or studs behind the molding.
For stability, place the nails every 16 inches or as necessary. Ensure that the molding surface is flush with the nails as you drive them.
By cutting the molding at a 45-degree angle and fastening the pieces together, repeat these steps for each exterior corner.
Make sure the mitered edges are properly aligned for a seamless and polished appearance.
To keep your crown molding installation’s coherence and aesthetic appeal, outside corners must be dealt with properly. Spend some time making sure the molding pieces fit tightly together and are accurately cut.
step VII: Filling and Finishing
After the crown molding is put in, you must finish the surface to give it a polished appearance by filling in any gaps or nail holes. For filling and finishing, adhere to these steps:
Fill visible nail holes and gaps with wood filler in the joints of the crown molding. A. Fill nail holes and gaps. Utilizing a small spatula or a putty knife, apply the wood filler, making sure it completely fills the holes. In order to ensure proper adhesion, spread the filler evenly across the surface and apply pressure.
Let the filler dry, then sand it. Follow the manufacturer’s instructions for giving the wood filler enough time to dry. Sand the filled areas smoothly after they have dried. Start by leveling the surface and removing any extra filler with coarse-grit sandpaper.
To get a smooth finish, switch to finer-grit sandpaper. Sand the filled areas carefully in a circular motion until they are evenly blended with the rest of the molding.
Remove dust: After sanding, use a clean cloth or tack cloth to remove any dust or debris from the crown molding. Before applying any paint or stain, take this step to ensure a clean and smooth surface.
You can create a seamless and finished appearance for your crown molding installation by filling the nail holes and gaps and sanding the surface.
This step is essential to getting the crown molding ready for the final coat of paint or stain, which will improve the appearance of the piece as a whole.
Conclusion
Crown molding installation and cutting can be a satisfying do-it-yourself project that enhances the beauty and style of your home.
Accuracy, careful consideration of every detail, and patience are essential throughout the entire process.
To ensure a professional-looking installation, take accurate measurements, make clean cuts, deal with inside corners, and guarantee a tight fit.
Don’t be hesitant to take on this do-it-yourself project and see how crown molding can completely change the look of your room by bringing a touch of class and style.
You now have the information and assurance needed to cut and install crown molding like a pro thanks to this thorough guide.
Have fun making your house a haven of elegance and style and improving it!
FAQs: guide to Cutting and Installing Crown Molding
What is crown molding?
Crown molding is a decorative trim installed along the uppermost part of the walls where they meet the ceiling. It adds an elegant touch to a room and helps to create a smooth transition between the walls and the ceiling.
How do I determine the correct angle for cutting crown molding?
Determining the correct angle for cutting crown molding can be challenging. The most common method is to use a miter saw and a bevel gauge to measure and transfer the angles from the wall and ceiling onto the saw for precise cuts. Online crown molding angle calculators and templates can also be useful in determining the correct angles.
How do I maintain crown molding after installation?
Crown molding requires minimal maintenance. Regular dusting or light cleaning with a soft cloth or a feather duster is usually sufficient. Avoid using harsh chemicals or abrasive materials that can damage the molding’s finish.
Can crown molding be painted or stained?
Yes, crown molding can be painted or stained to match your desired color scheme. Before painting or staining, ensure that the molding is clean and free of dust or debris. Apply a suitable primer or stain before the final coat of paint or stain for a professional finish
Also Read:
10 Captivating Vaulted Ceiling Crown Molding Ideas
Creative Corrugations: Inspiring Ideas for Stunning Corrugated Metal Ceilings