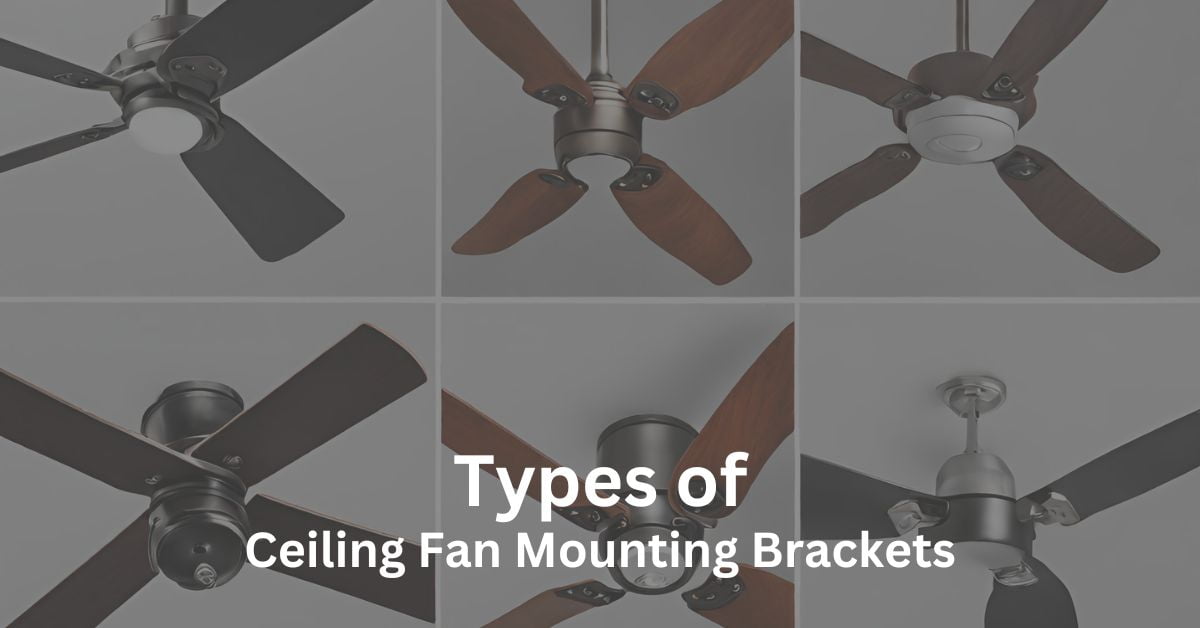
In this blog post, you’ll get to know about the different types of ceiling fan mounting brackets.
Learn about each bracket type and how to choose the best one for your space.
Understanding these mounting choices is vital when replacing or installing a new ceiling fan.
Keep Reading this blog post which is all about Ceiling fan mounting Brackets!
Standard Mounting Bracket: ceiling fan mounting Brackets
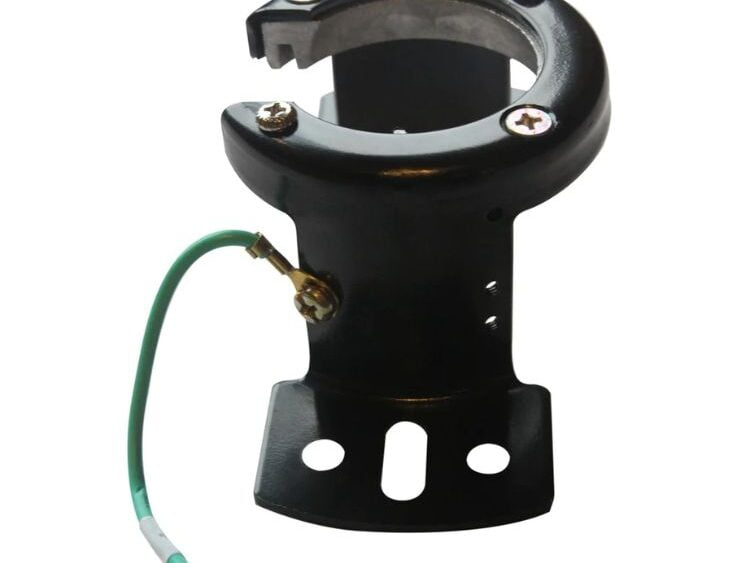
- A basic part used to fasten a ceiling fan to the ceiling is the standard mounting bracket.
- Usually, it’s a metal plate, either round or rectangular, with screw holes already drilled in it.
- The bracket’s purpose is to allow wiring connections while providing a strong grip for the fan motor.
Features
- Sturdy construction to support the weight of the fan.
- Easy installation thanks to pre-drilled holes.
- Usually composed of metal for robustness.
The Installation Procedure
- At the circuit breaker, turn off the power to the ceiling fan circuit.
- Take down any existing lighting or ceiling fans.
- Using the included screws, fasten the mounting bracket to the ceiling junction box.
- Join the wiring in the fan’s canopy to the wiring coming from the ceiling.
- Raise the fan motor, line it up with the mounting bracket, and screw it into position.
- Fit the motor assembly’s fan blades onto it.
- Restart the electricity and make sure the fan is operating properly.
- Adjust the fan as needed to get it balanced.
Angled Mounting Bracket
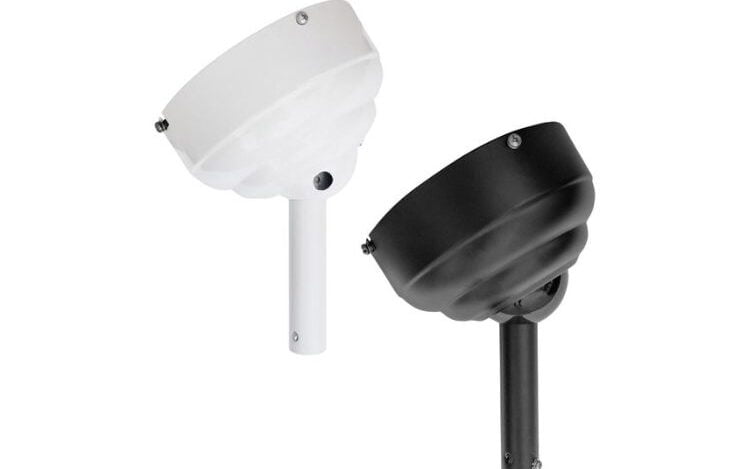
- Installation on sloped or vaulted ceilings is specifically intended for an angled mounting bracket.
- Usually, it has a pivot mechanism that enables the fan to be mounted asymmetrically to take into account the ceiling’s slope.
- To guarantee ideal alignment and stability, the bracket might have movable parts.
Purpose
- An angled mounting bracket’s main function is to enable the installation of ceiling fans on sloped or vaulted ceilings, where conventional mounting brackets would not be appropriate.
- It makes sure the fan, even on angled ceilings, hangs level and runs well.
Installation Considerations
- To choose the proper angled mounting bracket, measure the angle of the ceiling slope.
- To guarantee correct installation and alignment, carefully follow the manufacturer’s instructions.
- To make sure the fan is mounted properly and runs smoothly, use a level.
- Tightly fasten every part to avoid instability or swaying.
- To guarantee safety and appropriate operation, take into account hiring a professional installer for intricately angled ceilings.
Low Profile Mounting Bracket
Description
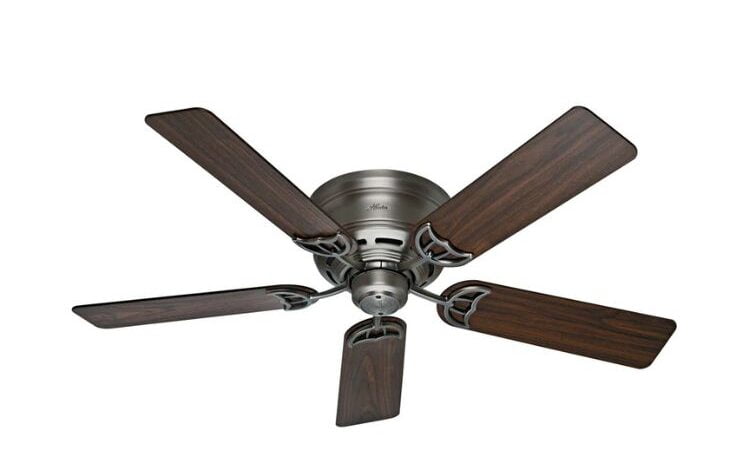
- To bring the ceiling fan closer to the ceiling, a low-profile mounting bracket, sometimes referred to as a flush mount or hugger bracket, is used.
- Typically, it is made up of a small, short metal plate that sits close to the ceiling and the fan motor.
- Because standard down rod mounts would hang the fan too low in rooms with low ceilings, the bracket is appropriate in these situations.
- you can also buy directly low profile ceiling fan.
Advantages
- Space-saving design: Low-profile mounting brackets help save vertical space in rooms with low ceilings by removing the need for a down rod.
- Safety: The fan’s proximity to the ceiling lowers the possibility of mishaps and injuries, especially in spaces with limited headroom.
- Better air circulation: By mounting the fan nearer the ceiling, you can improve the room’s airflow distribution and efficiency.
Installation Tips
- To support the weight of the fan, make sure the ceiling junction box is firmly fastened to the ceiling structure.
- To correctly attach the low-profile mounting bracket to the ceiling junction box, carefully follow the manufacturer’s instructions.
- Verify all connections one more time, and tighten screws firmly to avoid instability or wobbling.
- Run a test on the fan to make sure it runs quiet and smoothly.
- To get the best performance, if the fan wobbles after installation, think about using a balancing kit.
Dual Mounting Bracket
Description
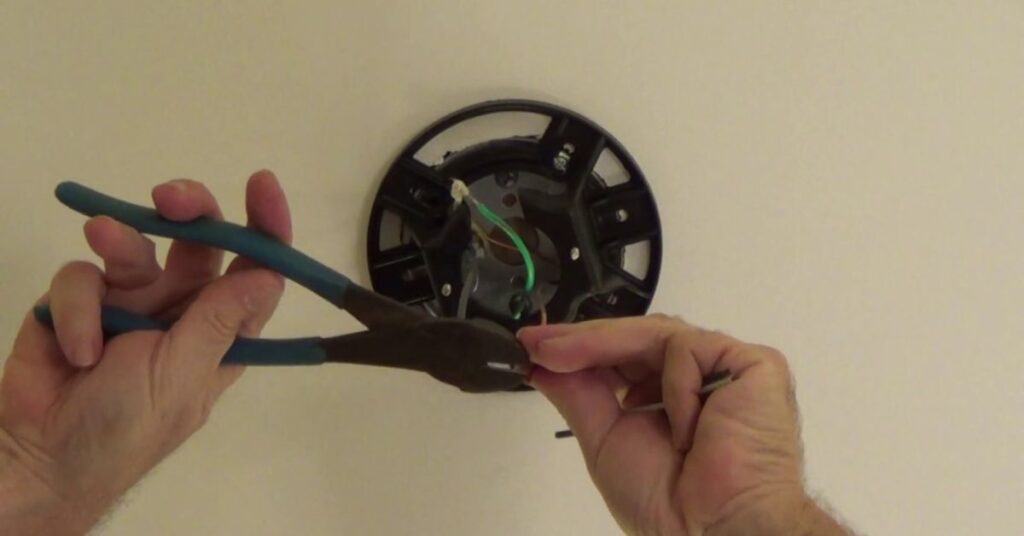
- A dual mounting bracket sometimes referred to as a convertible or universal bracket, is made to provide installation flexibility for fans.
- It usually consists of an adjustable component that allows for various mounting configurations, or a mounting plate with multiple sets of holes.
- The bracket offers flexibility for different ceiling heights and room layouts by being able to be used for both flush mounting and standard down rod mounting.
Adaptability
- Downrod mounting: In rooms with standard or high ceilings, the fan can be installed with a down rod to extend its reach from the ceiling for the best airflow. This is made possible by the dual mounting bracket.
- Flush mounting: The bracket allows flush mounting for rooms with low ceilings or aesthetic preferences for a close-to-ceiling installation by removing the down rod and fastening the fan directly to the mounting plate.
- Adjustable options: To offer even more installation versatility, certain dual mounting brackets have adjustable components that can be set to accommodate various ceiling heights and angles.
Guidelines for Installation
- Considering the room’s aesthetics and ceiling height, decide on the ideal mounting arrangement.
- Depending on the preferred mounting technique, choose the proper arrangement of mounting holes or modify the bracket’s parts as necessary.
- To firmly fasten the dual mounting bracket to the ceiling junction box, carefully follow the manufacturer’s instructions.
- If a down rod is being used, make sure it is firmly fastened to the mounting bracket and correctly affixed to the fan motor by the manufacturer’s instructions.
- To ensure a tight fit when flush mounting, affix the fan motor directly to the mounting plate with the supplied screws.
- Check that the fan is operating smoothly by testing it, and make any necessary adjustments to the parts to get the right balance and stability.
Extended Downrod Mounting Bracket
Description
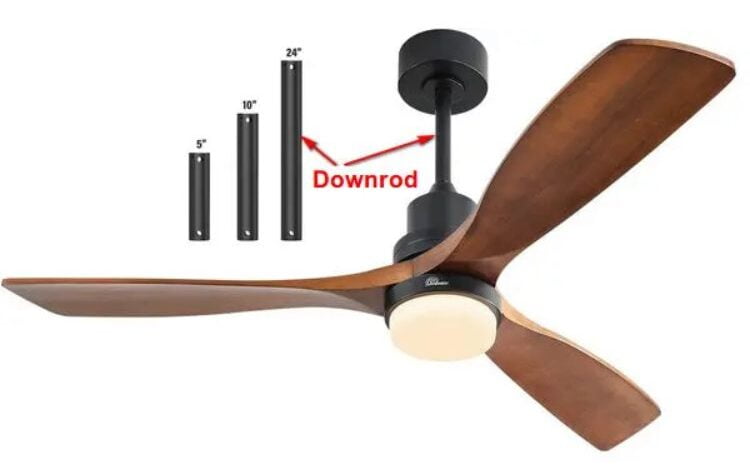
- Compared to standard down rod lengths, an extended downrod mounting bracket lowers the ceiling fan farther from the ceiling.
- Usually, it includes an extended down rod and matching mounting hardware to give the fan blades more space to clear the ceiling.
- The bracket works well in spaces with very tall ceilings or for decorative reasons when a more dramatic fan location is preferred.
Application
- Rooms with high ceilings: In rooms with high ceilings, where standard down rods might not offer enough clearance for adequate air circulation, extended down rod mounting brackets are frequently used.
- Aesthetic considerations: By highlighting the fan and improving the room’s overall design, an extended down rod can make a focal point in rooms with high ceilings or open floor plans that are more visually appealing.
- Functional necessity: To guarantee appropriate airflow and fan performance, an extended down rod might be required in some situations, such as in rooms with cathedral or vaulted ceilings.
Steps for Installation
- Based on the desired fan placement and ceiling height, measure the down rod to the proper length.
- Using the supplied screws, firmly fasten the down rod to the fan motor assembly by the manufacturer’s instructions.
- Using the included hardware, attach the extended down rod mounting bracket to the ceiling junction box, making sure it is firmly fixed to the ceiling structure.
- Raise the fan motor assembly and position it about the down rod, making sure the wiring is connected and routed through the down rod by the manufacturer’s instructions.
- Using the included screws, fasten the fan motor assembly to the down rod, making sure it is level and stable.
- Check for smooth operation and adequate airflow by testing the fan and adjusting its balance and alignment as needed.
Specialized Mounting Brackets
Slope Ceiling Adapter Bracket
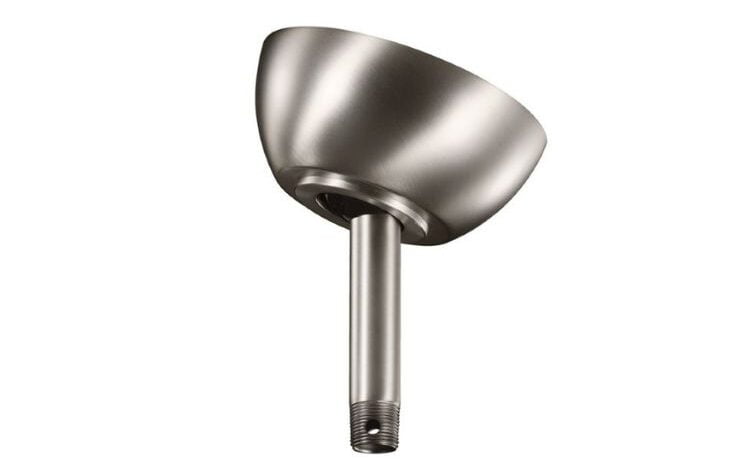
- Description: The purpose of a slope ceiling adapter bracket is to make it easier to install ceiling fans on angled or sloped ceilings.
- Functionality: It facilitates safe and effective operation by helping to level the fan housing and guarantee correct alignment with the sloped ceiling.
- Installation: To accommodate different angles of sloped ceilings, the bracket usually has movable parts or swivel mechanisms. It is mounted to provide a sturdy and safe connection between the fan mounting bracket and the ceiling junction box.
Cathedral Ceiling Mounting Bracket
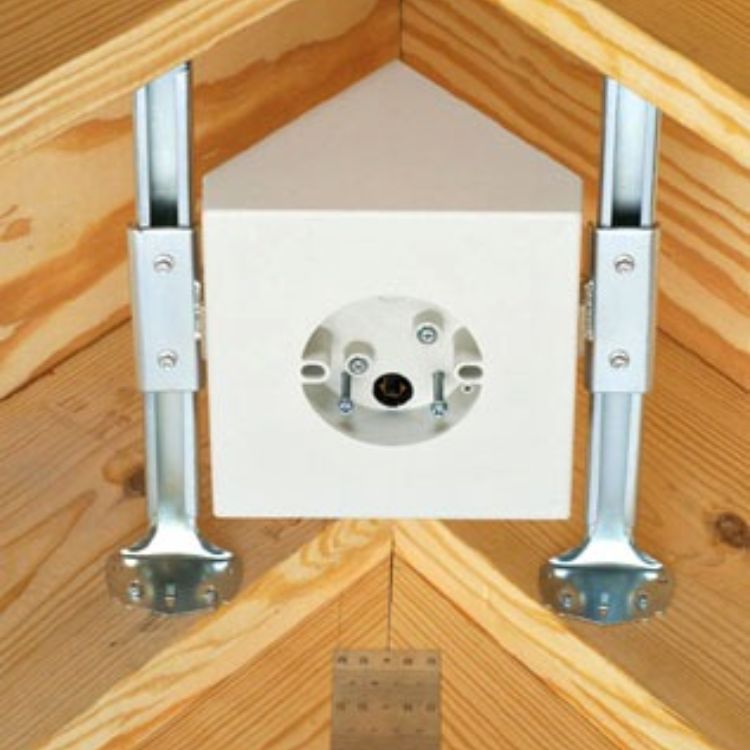
- Description: Because cathedral or vaulted ceilings have sharply angled slopes, mounting brackets for them are made to be installed on them.
- Functionality: It aids in stabilizing the fan and orienting it to match the ceiling’s angle, guaranteeing appropriate airflow and efficiency.
- Installation: To take into account the height and angle of the ceiling, cathedral ceiling mounting brackets frequently come with movable parts or extension rods. They are firmly fastened to the ceiling structure to give the fan a strong base.
Mounting Bracket for Outdoor Ceiling Fans
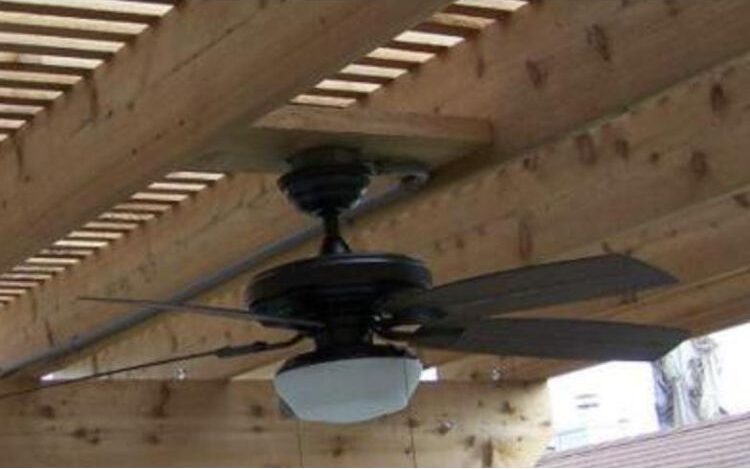
- Description: The purpose of an outdoor ceiling fan mounting bracket is to be used in outdoor spaces like patios, porches, and gazebos.
- Function: It is made of sturdy materials that are resistant to exposure to the weather, including changes in humidity, temperature, and moisture.
- Installation: To prevent corrosion and deterioration, outdoor ceiling fan mounting brackets may have extra weatherproofing features or coatings. Otherwise, they are installed similarly to standard mounting brackets.
Bracket for Vaulted Ceiling Mounting
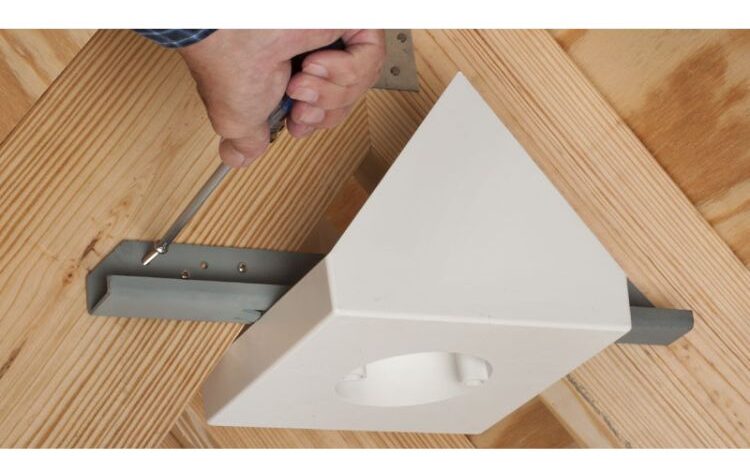
- Description: Ceiling fans in rooms with high-pitched or vaulted ceilings can be mounted using a vaulted ceiling mounting bracket.
- Functionality: It gives the fan a solid and safe mounting platform, guaranteeing correct alignment and support on the angled ceiling.
- Installation: To accommodate the height and angle of the ceiling, vaulted ceiling mounting brackets may come with extension rods or adjustable parts. They are firmly fixed into the ceiling structure to give the fan a dependable and safe attachment point.
Safety and Installation Tips
Capacity for Bearing Loads
- Verify that the mounting brackets and ceiling junction box can support the weight of the ceiling fan with adequate load-bearing capacity.
- To find out the maximum weight that the mounting hardware can support, refer to the manufacturer’s specifications.
- Take into account elements like the fan’s weight, the fixtures’ weight, and the weight of any extra accessories when determining the load-bearing capacity.
Safe Installation
- Using the proper fasteners, like anchors and screws, firmly fasten the mounting bracket to the ceiling junction box.
- To avoid the fan coming loose or detaching over time, double-check all of the connections and tighten the screws firmly.
- Verify that the fan blades are balanced and correctly fastened to the motor assembly to avoid instability or wobbling while operating.
Safety of Electrical Wiring
- Before starting installation or carrying out any electrical work, turn off the power to the ceiling fan circuit at the circuit breaker.
- To prevent electrical shock or injury, exercise caution when handling electrical wiring and adhere to the recommended safety precautions.
- Check to make sure all connections are made in accordance with local building codes and manufacturer instructions, and that the electrical wiring has been installed and secured correctly.
- To guarantee safety and compliance, think about working with a licensed electrician if you are uneasy or inexperienced with electrical work.
Suggestions for Expert Installation
- If the installation is complicated and requires specific mounting brackets or wiring arrangements, it may be best to hire a professional installer.
- To ensure correct operation and long-lasting performance, professional installers possess the necessary knowledge, expertise, and experience to safely and effectively install ceiling fans.
- Installations on high ceilings, sloped ceilings, or outside settings where extra skill might be needed may be especially advised for professional installation.
- Carefully follow the manufacturer’s instructions and guidelines if you decide to install the ceiling fan yourself, and don’t be afraid to ask for help if you need it.
Conclusion
- Standard Mounting Bracket: The essential part of the ceiling fan attachment system.
- Angled Mounting Bracket: Made especially for vaulted or sloping ceilings.
- Low Profile Mounting Bracket: Ideal for rooms with low ceilings, this bracket raises the fan closer to the ceiling.
- Dual Mounting Bracket: Provides flexibility for flush and standard mounting arrangements.
- Extended Downrod Mounting Bracket: Offers more space for high ceilings.
- Remote Control Mounting Bracket: Offers the remote control receiver a special place to store.
- Specialized Mounting Brackets: These brackets, which include slope ceiling adapter brackets, cathedral ceiling mounting brackets, outdoor ceiling fan mounting brackets, and vaulted ceiling mounting brackets, are made for particular types of ceilings or outdoor environments.
Things to Think About When Selecting the Correct Bracket
- Ceiling Height: To guarantee appropriate clearance and airflow, take the ceiling height into account when choosing a mounting bracket.
- Type of Ceiling: For the best installation, different mounting brackets may be needed for flat, sloped, or vaulted ceilings, among other ceiling types.
- Aesthetic Preferences: Select a mounting bracket that blends in with the décor and style of the room.
- Functionality: Take into account if you need weatherproofing or remote control compatibility for the fan installation.
Correct Installation Is Essential for Performance and Safety
- A secure and stable ceiling fan is ensured by proper installation, avoiding mishaps or injuries brought on by shaky or defective mounting.
- Proper installation guarantees adequate airflow and circulation throughout the room and enhances the ceiling fan’s performance and efficiency.
- Poor installation can shorten the fan’s lifespan and necessitate expensive repairs or replacements by causing early wear and tear on the fan’s components.
- To ensure maximum safety and performance, carefully follow the manufacturer’s instructions and, if you are not experienced with electrical work or complex installations, consider consulting a professional installer.
FAQs
Can I install a ceiling fan without a mounting bracket?
No, a mounting bracket is essential for safely and securely installing a ceiling fan. It provides structural support and ensures proper alignment with the ceiling.
Are ceiling fan mounting brackets included with the fan purchase?
In most cases, yes. Ceiling fan mounting brackets are typically included as part of the fan’s hardware kit.
Do I need special tools to install a ceiling fan mounting bracket?
Basic tools such as a screwdriver, drill, and ladder are typically needed for installing a ceiling fan mounting bracket. Specific tools may vary depending on the type of bracket and ceiling configuration.
Can I install a ceiling fan mounting bracket myself?
Yes, ceiling fan mounting brackets are designed for DIY installation. However, if you’re not comfortable with electrical work or mounting heavy fixtures, it’s recommended to hire a professional electrician for assistance.
